My MeatShop Blog
The Ultimate Guide to Halal Meat Storage & Freezing

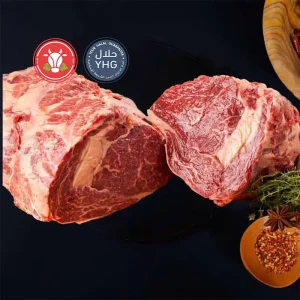
Whether you’ve just received your halal meat delivery or you’ve stocked up at your local butcher, knowing how to store halal meat properly is essential for maintaining its exceptional quality and flavour. Halal meat, prepared according to Islamic principles, deserves the same care and attention in storage as it receives during preparation. Poor storage can lead to freezer burn, loss of texture, and diminished taste—wasting both money and the blessing of good food. In this comprehensive guide, we’ll walk you through everything you need to know about storing, freezing, and thawing your halal meat to ensure every meal is as delicious and wholesome as intended.
Why Proper Halal Meat Storage Matters
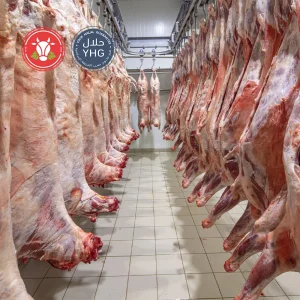
Storing halal meat correctly isn’t just about food safety—it’s about respecting the quality and care that goes into halal preparation. When animals are slaughtered according to Islamic guidelines, the blood is thoroughly drained, which actually gives halal meat natural advantages for storage. However, this also means the meat requires specific handling to maintain its texture and flavour profile.
Proper storage prevents bacterial growth, preserves nutritional value, and ensures your meat tastes fresh whether you’re cooking it tonight or three months from now. Additionally, when you’ve invested in premium halal meat from a trusted source, correct storage protects that investment and reduces food waste—a principle deeply valued in Islamic teachings. Understanding the science behind meat storage empowers you to make the most of your purchases and serve your family meals that are both safe and delicious.
read this article The Perfect Halal Roast: Tips for Juicy Lamb and Beef Every Time
Essential Storage Equipment & Materials
Before we dive into methods, let’s ensure you have the right tools for optimal halal meat storage:
For Refrigerator Storage:
- Airtight containers or sealed meat trays
- Cling film or butcher paper
- Temperature thermometer (fridge should be 0–4°C)
- Dedicated meat drawer or lowest shelf placement
For Freezer Storage:
- Heavy-duty freezer bags (remove excess air)
- Vacuum sealer (ideal but not essential)
- Freezer-safe containers
- Permanent marker for labelling
- Aluminium foil or freezer paper for extra protection
- Temperature thermometer (freezer should be -18°C or below)
Storage Labels Should Include:
- Type of meat (chicken breast, lamb chops, beef mince)
- Date of storage
- Weight or portion size
- Use-by date (if applicable)
Step-by-Step Guide to Storing Fresh Halal Meat
Immediate Storage After Purchase
Step 1: Act Quickly When your halal meat arrives or you return from the butcher, refrigerate or freeze it within two hours. If the ambient temperature is above 30°C, reduce this window to one hour.
Step 2: Check the Packaging If your meat arrives in professional vacuum-sealed packaging, you can store it directly in the fridge or freezer as is. If it’s in butcher paper or loose packaging, proceed to step 3.
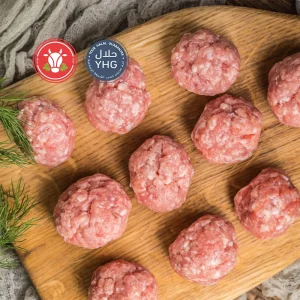
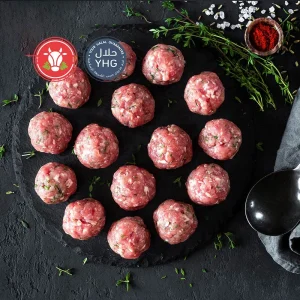
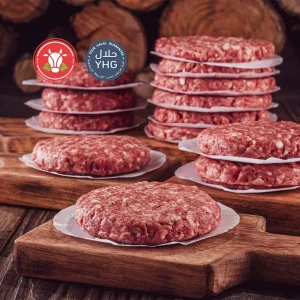
Step 3: Portion Your Meat Divide large quantities into meal-sized portions before freezing. This prevents you from having to defrost more than you need and reduces waste. For example, separate a kilogram of mince into 250g portions, or divide chicken breasts into packs of two.
Step 4: Wrap Properly For refrigerator storage (1–2 days): Keep in original packaging or wrap tightly in cling film. Place on a plate to catch any drips.
For freezer storage: Double-wrap your meat. First, wrap tightly in cling film or butcher paper, pressing out air pockets. Then place in a freezer bag, removing as much air as possible before sealing. For best results, use a vacuum sealer.
Step 5: Label Everything Write the contents, date, and weight on each package. Trust us—after a month in the freezer, all wrapped packages look the same!
Step 6: Store Strategically In the fridge: Place meat on the bottom shelf to prevent any drips contaminating other foods. Keep away from ready-to-eat items.
In the freezer: Place newer items at the back and older items at the front. Don’t overload the freezer—air needs to circulate for even freezing.
Storage Times & Temperature Guidelines
Refrigerator Storage (0–4°C)
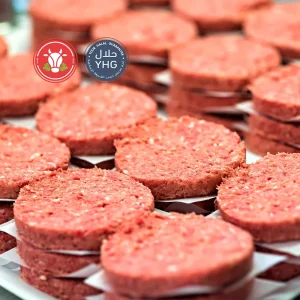
- Mince (beef, lamb, chicken): 1–2 days
- Chicken pieces: 1–2 days
- Whole chicken: 1–2 days
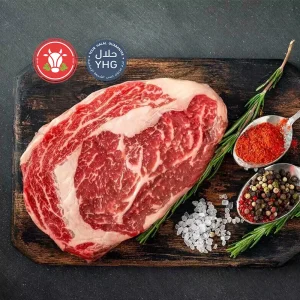
- Beef steaks and roasts: 3–5 days
- Lamb chops and roasts: 3–5 days
- Liver and offal: 1–2 days
- Cooked meat dishes: 3–4 days
Freezer Storage (-18°C or below)
- Mince (beef, lamb, chicken): 3–4 months
- Chicken pieces: 6–9 months
- Whole chicken: 12 months
- Beef steaks: 6–12 months
- Beef roasts: 12 months
- Lamb chops: 6–9 months
- Lamb roasts: 9–12 months
- Liver and offal: 3–4 months
- Cooked meat dishes: 2–3 months
Important Note: These times assume proper storage at consistent temperatures. Meat remains safe to eat beyond these times if kept frozen, but quality, texture, and flavour may deteriorate.
Expert Insights on Freezing Techniques
The Flash Freeze Method
For optimal quality, spread smaller pieces (like chicken wings or lamb chops) on a baking tray lined with parchment paper. Freeze until solid (about 2–3 hours), then transfer to freezer bags. This prevents pieces from freezing together in a solid block, allowing you to remove only what you need.
Preventing Freezer Burn
Freezer burn occurs when air reaches the meat’s surface, causing dehydration and discolouration. While safe to eat, it affects texture and taste. Prevention tips:
- Remove all air from packaging
- Use freezer-specific bags and containers
- Don’t refreeze thawed meat
- Maintain consistent freezer temperature
- Use meat within recommended timeframes
Marinating Before Freezing
Here’s a chef’s secret: marinate your meat before freezing. The meat absorbs flavours during the thawing process, and you’ll have ready-to-cook, flavourful meals at your fingertips. Place marinated meat in freezer bags, removing excess air, and freeze flat for easy stacking.
The Ice Glaze Method for Long-Term Storage
For meat you plan to store for several months, try this professional technique: After initial freezing, briefly dip the wrapped meat in ice water. The thin ice coating provides an extra barrier against freezer burn. Repeat once more, then store as normal.
Safe Thawing Methods
Never thaw halal meat at room temperature—this creates ideal conditions for bacterial growth. Use these safe methods instead:
Refrigerator Thawing (Recommended)
Place frozen meat on a plate on the bottom shelf of your fridge. Allow:
- 5–6 hours per 500g for small items
- 24 hours for larger roasts
- Thawed meat can stay in the fridge for 1–2 days before cooking
Cold Water Thawing (Faster Method)
Seal meat in a leak-proof bag and submerge in cold water. Change the water every 30 minutes. Allow:
- 1 hour per 500g
- Cook immediately after thawing
Microwave Thawing (Quickest, Last Resort)
Use your microwave’s defrost setting, following manufacturer guidelines. Cook immediately, as some areas may begin cooking during the process.
Cooking from Frozen
Many items, particularly mince and smaller cuts, can be cooked directly from frozen. Increase cooking time by approximately 50% and ensure the meat reaches safe internal temperatures (75°C for chicken, 70°C for other meats).
Signs Your Halal Meat Has Gone Off
Even with proper storage, know when to discard meat:
Smell: Fresh halal meat has a mild, clean scent. Discard if it smells sour, sulphurous, or ammonia-like.
Colour Changes: Some darkening is normal, but grey or green hues indicate spoilage. Note that vacuum-sealed meat may appear darker due to lack of oxygen—this is normal and colour should return once opened.
Texture: Fresh meat is firm and springs back when touched. Slimy or sticky textures indicate bacterial growth.
Packaging: Bloated or damaged packaging suggests bacterial activity or freezer burn.
When in Doubt: Don’t risk it. It’s better to discard questionable meat than risk foodborne illness.
Proper storage of halal meat is a simple yet crucial skill that preserves quality, prevents waste, and ensures your family enjoys safe, delicious meals every time. By following the guidelines in this comprehensive guide—from choosing the right packaging materials to understanding optimal storage times and mastering safe thawing techniques—you’ll protect both the investment you’ve made in premium halal meat and the nutritional value it provides. Remember: meat that’s stored well today becomes the foundation of memorable meals tomorrow. Take a moment to check your freezer labels, reorganise for better air circulation, and you’ll be rewarded with consistently excellent results.
Author Notes / Chef Tips
From the Kitchen: I’ve been working with halal meat for over fifteen years, and the single biggest mistake I see home cooks make is freezing meat in its original supermarket packaging. Those thin trays and cling film simply aren’t designed for long-term freezer storage. Invest in proper freezer bags—your future self will thank you when you pull out perfectly preserved lamb chops six months later that taste as fresh as the day you bought them.
My Personal Trick: I keep a small notebook in my kitchen with a freezer inventory. Every time I add or remove something, I update it. Sounds fussy, but it’s saved me countless times from buying meat I already have buried at the back of the freezer. Plus, it helps with meal planning—I can see at a glance what needs using up soon.
Cultural Note: In many Muslim households, bulk buying and proper storage is a tradition born from both practicality and the desire to always be prepared for guests. There’s a beautiful hadith about generosity and hospitality, and having a well-stocked freezer of quality halal meat means you’re always ready to welcome others to your table. Storage isn’t just practical—it’s part of living generously.